
发布时间:2023-08-30 14:37:22源自:http://www.haoyouyinxiang.com作者:好友印象大全阅读(124)
Bootcamp Win10: A Comprehensive Guide to Installing Windows 10 on Mac
Introduction
Are you a Mac user who wants to explore the world of Windows? Bootcamp Win10 is the perfect solution for you! Bootcamp is a built-in utility on Mac that allows you to install and run Windows on your Mac. In this guide, we will walk you through the step-by-step process of installing Windows 10 on your Mac using Bootcamp. So, let's get started!
Table of Contents
1. What is Bootcamp?
2. System Requirements
3. Preparing for Installation
4. Creating a Bootable Windows 10 USB Drive
5. Partitioning the Mac Hard Drive
6. Installing Windows 10
7. Setting Up Windows 10
8. Troubleshooting Bootcamp Issues
9. Conclusion
1. What is Bootcamp?
Bootcamp is a utility developed by Apple that allows Mac users to install and run Windows on their Mac computers. It creates a separate partition on the Mac hard drive, where Windows can be installed and run independently. Bootcamp provides a seamless experience, allowing users to switch between macOS and Windows with ease.
2. System Requirements
Before proceeding with the installation, make sure your Mac meets the following system requirements:
- A Mac computer with an Intel processor (Mac computers with Apple Silicon are not currently supported by Bootcamp)
- At least 64GB of free storage space on your Mac hard drive
- A USB drive with at least 16GB of storage capacity
- A valid Windows 10 ISO file or installation disc
- An internet connection for downloading Bootcamp drivers
3. Preparing for Installation
Before you begin the installation process, it is essential to back up all your important data. While the installation process is generally safe, there is always a risk of data loss. It is better to be safe than sorry!
4. Creating a Bootable Windows 10 USB Drive
To install Windows 10 on your Mac, you will need a bootable USB drive. Here's how you can create one:
Step 1: Download the Windows 10 ISO file from the official Microsoft website.
Step 2: Insert the USB drive into your Mac.
Step 3: Open the Disk Utility app on your Mac.
Step 4: Select the USB drive from the list of available drives.
Step 5: Click on the "Erase" button and choose the format as "ExFAT."
Step 6: Once the USB drive is formatted, open the Terminal app on your Mac.
Step 7: Type the following command in the Terminal window:
```
sudo /Applications/Install\ macOS\ Mojave.app/Contents/Resources/createinstallmedia --volume /Volumes/Untitled --applicationpath /Applications/Install\ macOS\ Mojave.app
```
Step 8: Press Enter and enter your administrator password when prompted.
Step 9: The Terminal will now create a bootable Windows 10 USB drive. This process may take some time.
5. Partitioning the Mac Hard Drive
Before installing Windows 10, you need to create a separate partition on your Mac hard drive. This partition will be used to install Windows 10. Here's how you can do it:
Step 1: Open the Bootcamp Assistant app on your Mac. You can find it in the Utilities folder within the Applications folder.
Step 2: Click on the "Continue" button.
Step 3: Select the "Create a Windows 10 install disk" option and click on the "Continue" button.
Step 4: Choose the Windows 10 ISO file or installation disc and click on the "Continue" button.
Step 5: Use the slider to allocate the desired amount of storage space for Windows 10. Make sure you leave enough space for macOS.
Step 6: Click on the "Install" button to start the partitioning process. This may take some time.
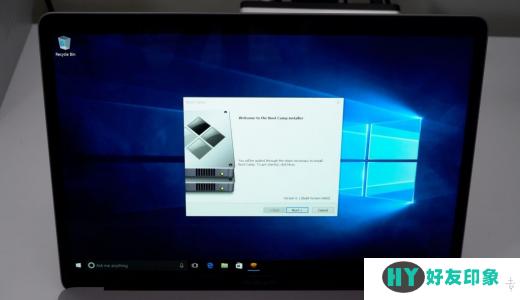
6. Installing Windows 10
Now that you have created a separate partition for Windows 10, it's time to install the operating system. Here's how you can do it:
Step 1: Restart your Mac and hold down the Option key until the startup disk selection screen appears.
Step 2: Select the Windows 10 installer disk and click on the "Continue" button.
Step 3: Follow the on-screen instructions to install Windows 10. Make sure you select the partition you created earlier during the installation process.
Step 4: Once the installation is complete, your Mac will restart, and you will be greeted with the Windows 10 setup screen.
7. Setting Up Windows 10
After installing Windows 10, you need to set it up according to your preferences. Here are a few essential steps to get you started:
Step 1: Select your region and language preferences.
Step 2: Connect to a Wi-Fi network.
Step 3: Sign in with your Microsoft account or create a new one.
Step 4: Customize your privacy settings.
Step 5: Set up a password for your Windows 10 account.
Step 6: Install Bootcamp drivers. Insert the USB drive you created earlier and follow the on-screen instructions to install the necessary drivers.
8. Troubleshooting Bootcamp Issues
While Bootcamp is generally reliable, you may encounter some issues during or after the installation process. Here are a few common problems and their solutions:
- Bootcamp Assistant not opening: Try restarting your Mac and opening Bootcamp Assistant again. If the issue persists, try resetting the NVRAM on your Mac.
- Windows 10 installation freezing or not completing: Make sure you have enough free storage space on your Mac hard drive. If the issue persists, try reinstalling Windows 10.
- Wi-Fi not working in Windows 10: Make sure you have installed the Bootcamp drivers correctly. If the issue persists, try updating the Wi-Fi driver in Windows 10.
9. Conclusion
Bootcamp Win10 provides Mac users with the opportunity to experience the best of both worlds by running Windows 10 on their Mac computers. With this comprehensive guide, you can easily install and set up Windows 10 using Bootcamp. So, what are you waiting for? Get started with Bootcamp Win10 and unlock a whole new world of possibilities!
欢迎分享转载→ bootcamp win10
下一篇:返回列表


